Food & Drink
How to temper chocolate at home: seeding, tabling and temperatures
Learn how to temper chocolate at home for a glossy finish and a clean snap, with temperatures for dark, milk and white chocolate and fixes for common mistakes.
 Bitezine Editorial TeamRankings, reviews & guides 6 min read
 AI generated
Knowing how to temper chocolate is the difference between homemade bonbons that look dull and streaky and ones that shine, snap cleanly and sit happily at room temperature. Tempering sounds like a professional secret, but it is really a controlled cycle of melting, cooling and gentle warming that you can do in a home kitchen with a bowl, a spatula and a thermometer.
This guide explains what tempering does, the temperatures for dark, milk and white chocolate, the two most reliable home methods, and how to test and rescue a batch that does not set properly.
What does tempering chocolate actually do?
Cocoa butter, the fat in chocolate, can set into six different crystal structures. Only one of them, usually called Form V, gives the qualities people expect from good chocolate: a glossy surface, a crisp snap, a smooth melt in the mouth and a slight shrink as it sets, which helps it release from moulds.
When you simply melt chocolate and let it cool, the fat sets into a mix of unstable crystals. The result is soft, dull, often grey-streaked and it melts on your fingers. Tempering melts all existing crystals and then encourages only the stable Form V crystals to grow, so the whole batch sets in that structure.
You need tempered chocolate for dipping, coating, moulding bars and bonbons, and making decorations. You do not need it for ganache, brownies, sauces or anything baked, because those recipes change the structure anyway.
Chocolate tempering temperatures for dark, milk and white
Temperatures vary slightly between recipes and makers, so if your chocolate comes with a tempering curve on the pack, follow it. As a general guide, these ranges work for most real chocolate made with cocoa butter:
- Dark chocolate: melt to 45–50°C, cool to about 27–28°C, rewarm to a working temperature of 31–32°C
- Milk chocolate: melt to 40–45°C, cool to about 26–27°C, rewarm to 29–30°C
- White chocolate: melt to 40°C or a little above, cool to about 25–26°C, rewarm to 28–29°C
Tempering is not a secret technique, just a controlled cycle of melting, cooling and gentle warming.
What you need before you start
Use real chocolate whose fat is cocoa butter. Coating products labelled as compound or 'cake covering' use other fats and do not need, or respond to, tempering. Chopped bars, buttons or callets all work; small, even pieces melt more predictably.
A digital probe thermometer or an instant-read thermometer is the most useful tool. You also want a dry heatproof bowl, a silicone spatula and a clean, dry kitchen. Even a few drops of water or steam can make chocolate seize into a thick, grainy paste, so keep the bowl away from boiling pans and wipe utensils completely dry.
Work with at least 300–500 g of chocolate if you can. Small amounts cool and heat too quickly to control, and leftover tempered chocolate can always be set on baking paper and reused later.
How to temper chocolate with the seeding method
Seeding is the easiest method for home cooks because the chocolate you add already contains the stable crystals you want. It works in a microwave or over a bain-marie.
- Weigh your chocolate and set aside about a quarter to a third of it, finely chopped. This is the seed.
- Melt the rest gently, in short microwave bursts of 20–30 seconds with stirring in between, or in a bowl over barely simmering water, until it reaches the melting temperature for its type.
- Take it off the heat and stir in the seed chocolate a little at a time. Keep stirring as it melts and the mixture cools.
- Continue until the chocolate reaches its working temperature. If pieces of seed remain, remove them or blitz briefly with a stick blender.
- Test the temper (see below), then use the chocolate while holding it in the working range.
How to temper chocolate by tabling
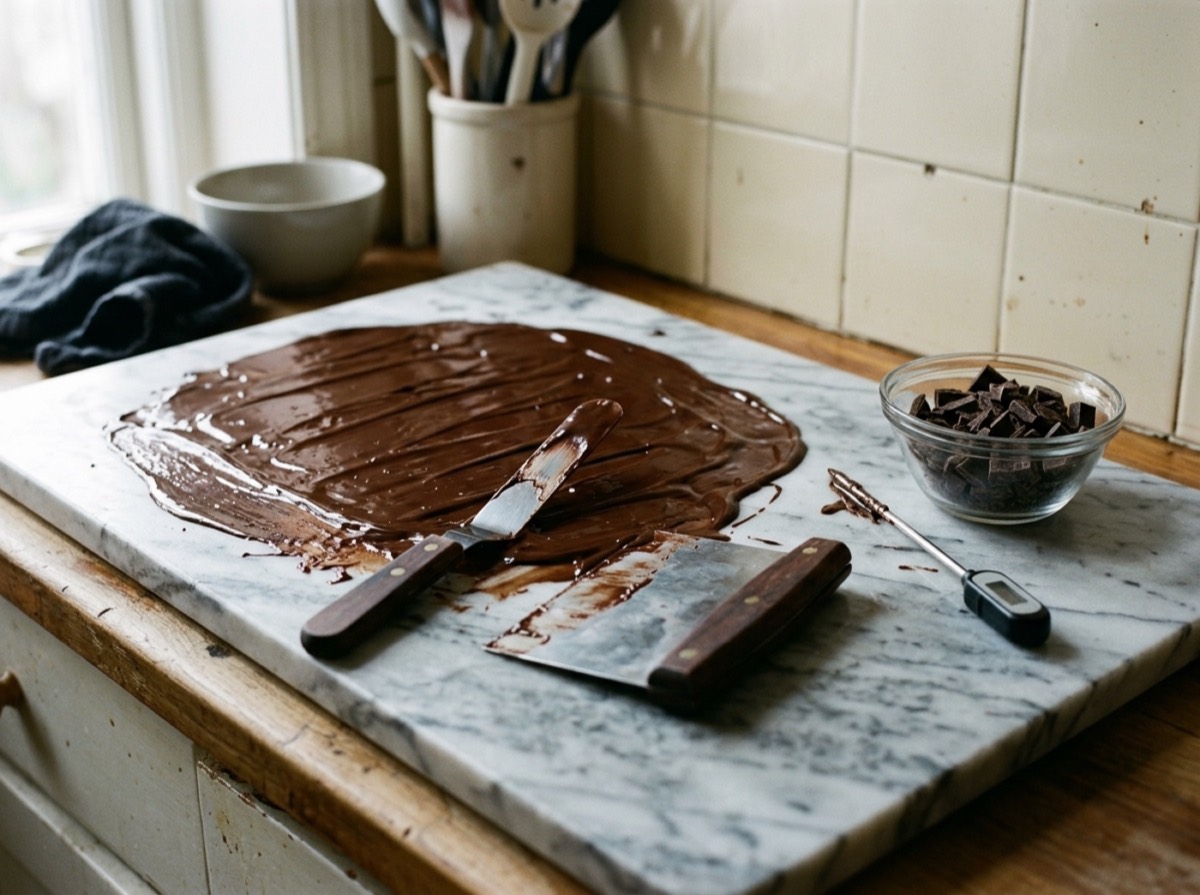
Tabling is the classic pastry-kitchen method. You pour about two thirds of the melted chocolate onto a cool marble or granite slab and spread and scrape it back and forth with a palette knife and scraper. The movement and cool surface bring it down to the cooling temperature, where it starts to thicken slightly.
You then scrape it back into the remaining warm chocolate and stir until the whole bowl reaches the working temperature. Tabling is quick once practised and feels intuitive, but it is messy and needs a large stone surface, so most home cooks prefer seeding.
How to test whether chocolate is tempered
Dip the tip of a knife, a spoon or a strip of baking paper into the chocolate and leave it at cool room temperature, ideally around 18–20°C. Well-tempered chocolate sets within about five minutes, looks evenly glossy and snaps or peels away cleanly.
If it stays tacky, sets with grey streaks or looks matte and patchy, the temper is off. Adjust and test again before you dip or fill anything; testing takes a few minutes and saves a whole tray of bonbons.
Common tempering mistakes and how to fix them
Most problems come from temperature drift. Tempered chocolate is not a fixed state: if it gets too warm, the stable crystals melt; if it cools too far, it thickens and sets in the bowl.
- Streaks or grey swirls: the chocolate was not fully tempered or set too slowly in a warm room. Remelt and start again.
- Chocolate went over working temperature: add more seed chocolate and stir it back down.
- Chocolate is getting thick: warm it very briefly, a few seconds in the microwave or with a hairdryer on low, without going above the working range.
- Grainy, stiff mass: water got in and the chocolate seized. It cannot be tempered now, but it is still fine for ganache, sauces or baking.
- Bonbons stick in the mould: the chocolate was under-tempered or the moulds were not clean and polished.
How to store tempered chocolate
Let finished pieces set at cool room temperature rather than in the fridge, where condensation can cause sugar bloom. A short spell in the fridge of five to ten minutes is fine to help moulded pieces release, as long as they come back to room temperature in a closed container.
Store chocolate in a dark, dry, cool place, ideally around 15–17°C and away from strong smells. Warmth and temperature swings cause fat bloom, the soft white film that appears when fat moves to the surface. Bloomed chocolate is safe to eat and can simply be melted and tempered again.
Frequently asked questions
Can I temper chocolate without a thermometer?
+
Yes, but it is less reliable. Use the seeding method and dab a little chocolate just below your lower lip: it should feel slightly cooler than your skin. Always confirm with a set test on a knife or paper before using it.
How do I temper chocolate in the microwave?
+
Melt two thirds of the chopped chocolate in 20–30 second bursts, stirring each time, until fully melted. Stir in the remaining third until it melts and the chocolate reaches its working temperature, then test before use.
Do I need to temper chocolate chips?
+
Usually not. Many chips are made to hold their shape in baking and may contain less cocoa butter, so they are poor for dipping. For glossy coatings, use bars or callets of real chocolate and temper them.
Why did my chocolate turn white after a few days?
+
That white film is bloom. Fat bloom comes from warmth or temperature swings, sugar bloom from moisture such as fridge condensation. It is harmless, and remelting and retempering restores the appearance.
What happens if you don't temper chocolate?
+
It still tastes the same, but it sets soft, dull and often streaky, melts quickly when handled and does not release well from moulds. For baking and sauces that does not matter.
How long does tempered chocolate stay tempered?
+
As long as you keep it within the working range and stir occasionally. Once it cools and sets, it stays tempered until it is melted again above the working temperature.
Tempering chocolate rewards patience more than special skill. Use real chocolate, keep water away, trust your thermometer and always run a quick set test. Once you have tempered a few batches with the seeding method, the temperatures for dark, milk and white chocolate become second nature, and glossy homemade bars and bonbons stop feeling like a professional trick.
How we research: Guides are written from established sources and checked for accuracy. They are general information, not professional advice.
Written by
Bitezine Editorial Team
Rankings, reviews & guides
Our editors research every piece from makers’ documentation, independent tests and owner reports, and update it when products change.